
Author notes
Coloring - Step 4
Avart onLet's start coloring.
The first thing is to choose the colours you want. Don't choose a thousand colors, just a few because we´re applying a base color before begin the shading process.
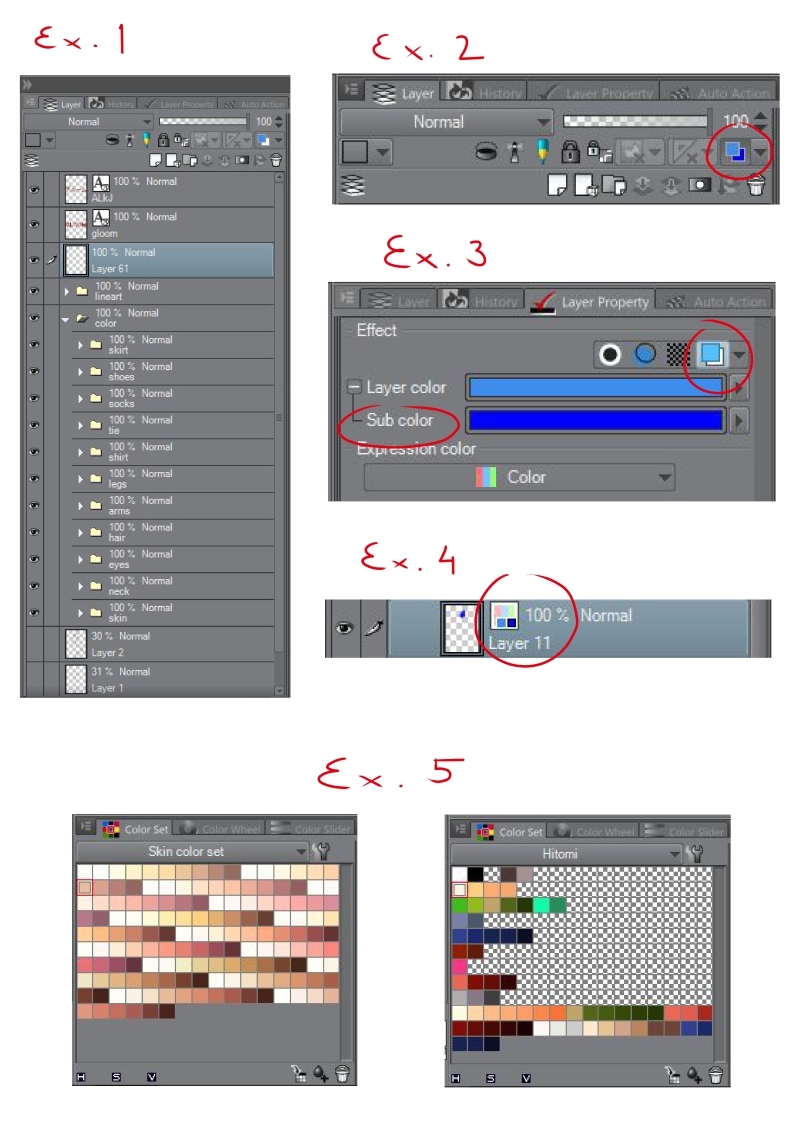
The important thing it's to manage your layers on folders, this way you don't need to rename every layer. sure, it takes some time but I prefer doing this before I get lost in a layer scramble. (example 1)
When you colour parts like skin or eyes, you normally use clear colors that blend whit the layer paper/background, so it's hard to see if there´s an unfilled pixel. The solution is to activate a "sub layer" (example 2) with a different color (usually I use a contrasting one, like the blue but please never use the black color).
The layer on which this sub layer is activated will show a little icon in advise (example 4).
The only thing you need to do, is to choose your desired color and fill the area with the paint bucket tool (it's normal that some pixels don't get filled, just fill them with a brush), and you'll see that instead of filling with your chosen color, it fills with the sub layer one.
In my software, I could set my prefered colors, so I don't have to spend time searching them again and rename the way I want, here's a Skin Color Set and the set for the girl I'm drawing, Hitomi (example 5)
I'll show you the result on the next page


Comments
Please login to comment.
Login or Register${ comment.author }} at
${ comment.author }} at